

I started making some of my own oil paint a few years ago when I was in search of a higher quality Ultramarine Blue. In using a limited palette at that time, I was dependent on the ultramarine for providing the basis for the dark side of my palette. I needed the deepest, darkest, most heavily-pigmented ultramarine I could find. The best solution to my problem was to make my own. I stay away from cadmiums and toxic pigments, and just buy those in the store. Some pigments mix up easier than others. Ultramarine is a cinch!
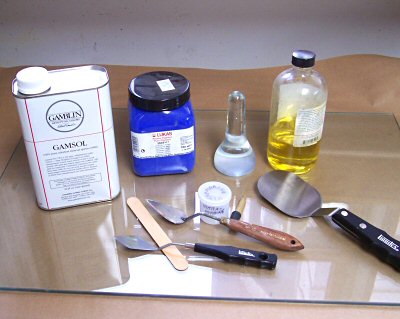
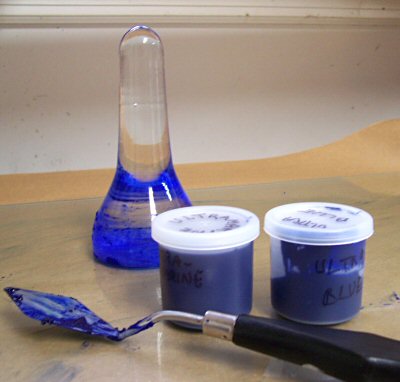
The photo above shows the materials I use for paintmaking. I made this batch of Ultramarine Deep today and took these photos as I went to show my process. Making paint is my version of playing in the sandbox.
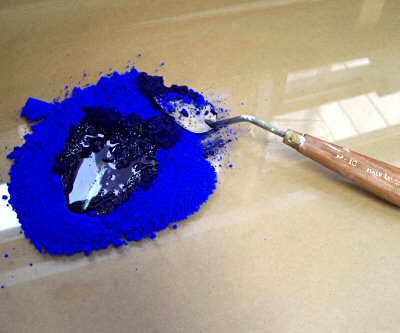
I begin with a nice big pile of pigment (above) on a 1/4″ glass slab, and make a crater in the center. I fill the crater with alkalai-refined linseed oil.
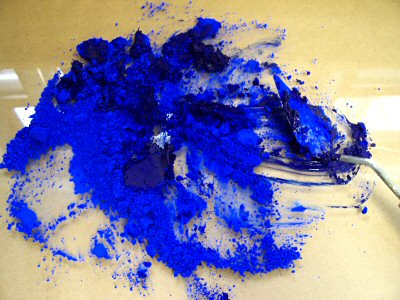
I work the oil into the dry pigment particles. I add more oil a little at a time as needed. I suppose I could do this more scientifically by taking careful measurements, but as in cooking, I prefer to adjust as needed rather than following a recipe. Now it’s time to take out the glass muller.

Contrary to what you might think, the paint becomes runnier as it is mulled. The glass muller crushes the clumps of pigment particles apart, so that the individual particles will be surrounded by the oil binder.

Since the paint tends to liquify as the oil surrounds the individual pigment particles, you may find it gets too runny and you need to add more pigment. There is actually quite a fine line between too much and not enough.
You may think you need quite a bit more pigment to increase the body of the paint, and then in a flash the entire mass becomes dry and unworkable. (above) A little more oil does the trick.
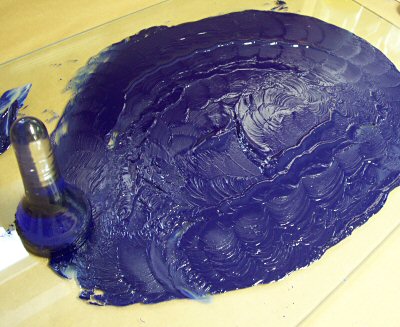
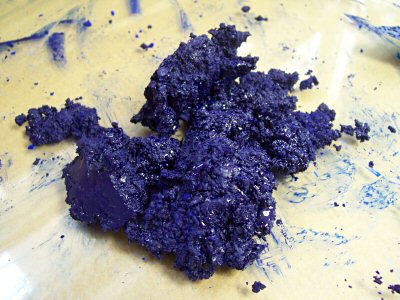
This is what I consider mulled to perfection. The pigment is well mulled into the oil. You can tell from the sheen that there is enough oil so that the paint won’t be underbound. If I add more pigment at this point, it will likely clump together again.
I’m done! I store these small containers of homemade paint in the freezer, and clean up the implements with mineral spirits or Windex. The paint containers will keep in the freezer indefinitely, as the cold slows the oxidation of the paint and the containers are airtight. I could put it into tubes if I preferred. Ultramarine pigment can get stringy when left sitting in oil, and since I don’t use wax or other additives in my paint to counteract that tendency, I find it keeps a better working consistency in the freezer.
Now it’s time to go paint!
Edit: I have removed the step of adding any mineral spirits at all, even in small amounts. I have done it both ways, and I think it is easier to gauge the proportions of oil and pigment without additional ingredients. Mineral spirits can result in underbinding of the paint, and it’s better not to take that risk.
Hi Jaime:
Thanks for this detailed posting. It is very interesting. I’ll try it definitely. Just wanted to know if you make your paint with any other pigments or not.
Farah
Left by Farah on January 17th, 2009